Java ExecutorService

We have seen Java Timer Class in our earlier tutorial to. ExecutorService will be better option than using Timer since configured with any number of threads but Timer has only one execution thread.
Another important point to ExecutorService is, if any run-time exception occurred inside TimerTask then current task will be canceled and rest will be continued in ExecutorService. Where as in Timer kill the Thread and following scheduled tasks won’t run further.
Lets see simple example's of how to run a repeated task at a specified interval using ExecutorService.
Java ExecutorService


Single Threaded:


public class JavaExecutorService {

 public static void main(String[] args) throws InterruptedException {
  
  TimerTask repeatedTask = new TimerTask() {
         public void run() {
             System.out.println("OUTPUT : " + Thread.currentThread().getName()  + " : Random Number : "+new Random().nextInt(1000));
         }
     };
     ScheduledExecutorService executor = Executors.newSingleThreadScheduledExecutor();
     long delay  = 1000L;
     long period = 1000L;
     executor.scheduleAtFixedRate(repeatedTask, delay, period, TimeUnit.MILLISECONDS);
 }
}


OUTPUT:


OUTPUT : pool-1-thread-1 : Random Number : 608
OUTPUT : pool-1-thread-1 : Random Number : 62
OUTPUT : pool-1-thread-1 : Random Number : 161
OUTPUT : pool-1-thread-1 : Random Number : 141
OUTPUT : pool-1-thread-1 : Random Number : 954
OUTPUT : pool-1-thread-1 : Random Number : 565
OUTPUT : pool-1-thread-1 : Random Number : 839
.
.
.


By Setting Thread-pool Size:


public class JavaExecutorService {

 public static void main(String[] args) throws InterruptedException {
  
  TimerTask repeatedTask = new TimerTask() {
         public void run() {
             System.out.println("OUTPUT : " + Thread.currentThread().getName()  + " : Random Number : "+new Random().nextInt(1000));
         }
     };

     //Setting threadpool size to 5
     ScheduledExecutorService executor = Executors.newScheduledThreadPool(5);
     long delay  = 1000L;
     long period = 1000L;
     executor.scheduleAtFixedRate(repeatedTask, delay, period, TimeUnit.MILLISECONDS);
 }
}


OUTPUT:


OUTPUT : pool-1-thread-1 : Random Number : 562
OUTPUT : pool-1-thread-1 : Random Number : 207
OUTPUT : pool-1-thread-2 : Random Number : 912
OUTPUT : pool-1-thread-1 : Random Number : 165
OUTPUT : pool-1-thread-3 : Random Number : 676
OUTPUT : pool-1-thread-2 : Random Number : 956
OUTPUT : pool-1-thread-2 : Random Number : 987
OUTPUT : pool-1-thread-2 : Random Number : 866
OUTPUT : pool-1-thread-2 : Random Number : 331
OUTPUT : pool-1-thread-3 : Random Number : 183
OUTPUT : pool-1-thread-3 : Random Number : 669
OUTPUT : pool-1-thread-3 : Random Number : 617
OUTPUT : pool-1-thread-3 : Random Number : 719
OUTPUT : pool-1-thread-3 : Random Number : 757
OUTPUT : pool-1-thread-3 : Random Number : 728
OUTPUT : pool-1-thread-3 : Random Number : 77
OUTPUT : pool-1-thread-5 : Random Number : 66
OUTPUT : pool-1-thread-2 : Random Number : 64
OUTPUT : pool-1-thread-4 : Random Number : 643
.
.
.


Java Timer

Timer and TimerTask classes are important java util class used to schedule tasks in a background thread. On other way TimerTask is a task performer and Timer is a scheduler to set the time to run the task. By using these classes we can schedule the task to run at a specified time once or we can set repeated task at an interval. Lets see simple Java example for both by scheduling task once and repeated task at an interval.
Java Timer


Scheduling Task Once:


import java.util.Random;
import java.util.Timer;
import java.util.TimerTask;

public class JavaTimer {

 public static void main(String[] args) {
  
  TimerTask task = new TimerTask() {
         public void run() {
             Random rand = new Random();
             System.out.println(Thread.currentThread().getName() + rand.nextInt(1000));
         }
     };
     
     Timer timer = new Timer("Generate Random Number : ");
      
     long delay = 500L;
     timer.schedule(task, delay);
 }
}


OUTPUT:


Generate Random Number : 237


Repeated Task at Interval:


import java.util.Random;
import java.util.Timer;
import java.util.TimerTask;

public class JavaTimer {

 public static void main(String[] args) {
  
  TimerTask task = new TimerTask() {
         public void run() {
             Random rand = new Random();
             System.out.println(Thread.currentThread().getName() + rand.nextInt(1000));
         }
     };
     
     Timer timer = new Timer("Generate Random Number : ");
      
     long delay = 500L;
     long period = 1000L;
     timer.scheduleAtFixedRate(task, delay, period);;
 }
}


OUTPUT:


Generate Random Number : 519
Generate Random Number : 973
Generate Random Number : 859
Generate Random Number : 942
Generate Random Number : 578
Generate Random Number : 764
Generate Random Number : 256
Generate Random Number : 802
Generate Random Number : 926
Generate Random Number : 69
Generate Random Number : 875
.
.
.

Removing null elements from List in Java

In this tutorial lets see how to remove null elements from the given list by using java Collections. Basic we could think iterating through List and to delete all null elements. But by using Collections class it makes easy to remove all null elements. Lets see simple example to delete null elements from list.
Removing null elements from List in Java


public static void main(String[] args) {
 
 final List<Integer> list = new ArrayList<Integer>();
 Collections.addAll(list, 1,2,null,3,4,null,5,6,null,7,8,null,9);
 
 System.out.println("LIST SIZE : "+list.size()+ " - " + list);
 
 list.removeAll(Collections.singleton(null));
 
 System.out.println("LIST SIZE : "+list.size()+ " - " + list);
}


OUTPUT:


LIST SIZE : 13 - [1, 2, null, 3, 4, null, 5, 6, null, 7, 8, null, 9]
LIST SIZE : 9 - [1, 2, 3, 4, 5, 6, 7, 8, 9]


Create user defined substring functions

 
In many interviews we may asked to substring() a string without using substring function from String class. Below are the simple code how we can write our own substring functions similar to String class functions.


public class MyStringOp {

 public static void main(String[] args) {
  
  String str = "Java Discover";
  
  MyStringOp obj = new MyStringOp();
  
  System.out.println(obj.mySubstring(str, 5));
  
  System.out.println(obj.mySubstring(str, 0,4));
 }
 
 public String mySubstring(String str, int start){
  
  if(start > str.length()) 
   throw new StringIndexOutOfBoundsException(); 
  
  String newStr = "";
  char[] ch = str.toCharArray();
  
  for(int i=start;i<str.length();i++){
   newStr = newStr + ch[i];
  }
  return newStr;
 }
 
 public String mySubstring(String str, int start, int end){
  
  if((start > end) || (start > str.length()) || (end > str.length())) 
   throw new StringIndexOutOfBoundsException(); 
  
  String newStr = "";
  char[] ch = str.toCharArray();
  
  for(int i=start;(i<str.length() && i<end);i++){
   newStr = newStr + ch[i];
  }
  return newStr;
 }
}


OUTPUT:


Discover
Java


Simple Factory Design Pattern class

Lets design simple Factory Design Pattern example with code, like how to design a Factory class and how to get objects from factory. 

Consider the scenario that showroom needs application to access their various Car details through online. Like Car1 runs on Petrol and gives mileage upto 28 KM/L and Car2 runs on Diesel and gives mileage upto 24 KM/L. 
Lets create simple Factory Class to create car objects based on parameter information's.

AANND


public interface Car {
 public String getCallDetails();
}


public class Alto implements Car{

 public String getCallDetails() {
  return "Alto runs on Petrol and gives mileage upto 18 KM/L";
 }
}


public class Swift implements Car{

 public String getCallDetails() {
  return "Swift runs on Diesel and gives mileage upto 24 KM/L";
 }
}


public class CarFactory {

 public static Car getCar(String carName){
  
  Car car = null;
  
  if(carName.equalsIgnoreCase("alto")){
   car = new Alto();
  
  }else if(carName.equalsIgnoreCase("swift")){
   car = new Swift();    
  }
  
  return car;
 }
}


public class ShowRoomApplication {

 public static void main(String[] args) {
  
  Car car1 = CarFactory.getCar("alto");
  String details = car1.getCallDetails();
  System.out.println(details);
  
  Car car2 = CarFactory.getCar("swift");
  details = car2.getCallDetails();
  System.out.println(details);
  
  
 }
}


Output:


Alto runs on Petrol and gives mileage upto 28 KM/L
Swift runs on Diesel and gives mileage upto 24 KM/L

Java Thread Local with simple example


Java ThreadLocal is an interesting and important Class in Java where most the developers unaware of it. Lets see what is Java ThreadLocal by its importance and how to use it with simple sample code.
Java Thread Local with simple example


What is Java ThreadLocal?
Java ThreadLocal gives the scope of an Object which stored in the ThreadLocal. We can set any Object in the Thread Local which inturns to be global access for the Thread from anywhere. 
Only thing which we need to keep in mind that to maintain a separate instance copy for each thread, so that Object conflict won't occur between multiple threads.
Values stored in ThreadLocal are local to each threads, i.e., each thread will have it's own ThreadLocal Objects where one thread can not access/modify other thread's Thread Local Objects unless it satisfies preview statement. 

Where to use Java ThreadLocal?
Lets a take situation that we need to use some global value for each thread which can be access across and anywhere the Thread is been called (For example in any methods). In those cases we can value or Object in ThreadLocal and same value or Object can be accessed anywhere in particular Thread call. 

There are 4 methods in ThreadLocal class and they are

  • initialValue() - Returns the current thread's "initial value" for this thread-local variable.
  • get() - Returns the value in the current thread's copy of this thread-local variable.
  • set() - Sets the current thread's copy of this thread-local variable to the specified value.
  • remove() - Removes the current thread's value for this thread-local variable.

Lets see simple example how to use ThreadLocal in Java.


public class MyLocalThreadHolder{
 
 private static final ThreadLocal<String> myThreadLocal = new ThreadLocal<String>();

 public static void set(String val) {
  myThreadLocal.set(val);
 }
 
 public static void delete() {
  myThreadLocal.remove();
 }
 
 public static String get() {
 return myThreadLocal.get();
 }
}


public class TestThreadLocal extends Thread{

 public TestThreadLocal(String tName) {
  this.setName(tName);
 }
 
 public static void main(String[] args) {
 
  TestThreadLocal t1 = new TestThreadLocal("First thread...");
  TestThreadLocal t2 = new TestThreadLocal("Second thread...");
  TestThreadLocal t3 = new TestThreadLocal("Third thread...");
  
  t1.start();
  t2.start();
  t3.start();
 }
 
 @Override
 public void run() {
  //Setting thread name in ThreadLocal
  MyLocalThreadHolder.set(currentThread().getName());
  new PrintLocalThread().printThreadName(); 
 }
}


public class PrintLocalThread {
  
 public void printThreadName(){
  //Getting thread name from ThreadLocal and printing
  String currentThreadName = MyLocalThreadHolder.get();
  System.out.println("Before ----> : "+currentThreadName);
  
  //Removing value set in ThreadLocal
  MyLocalThreadHolder.delete();
  
  currentThreadName = MyLocalThreadHolder.get();
  System.out.println("After ----> : "+currentThreadName);
 }  
}


OUTPUT:


Before ----> : Second thread...
After ----> : null
Before ----> : First thread...
After ----> : null
Before ----> : Third thread...
After ----> : null


Using Mutable Objects inside user defined Immutable Class

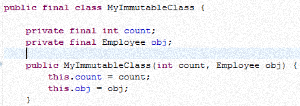
We may aware of creating user defined Immutable Class in Java. Basic steps to follow to create immutable class are
Using Mutable Objects inside user defined Immutable Class

  • Maintain all member variables and class has defined with final keyword so that variables value can't be modifies and class can't be overridden. 
  • Variables values must to set through constructor or through factory pattern.
  • Provide only getter methods for member variable. 
In below example lets see simple code which uses mutable object as member variable inside our Immutable class. By returning same original Object in getter which gives loop for user to alter the Objects internal values.


public class Employee {
 private int id;
 private String name;
 private int age;
 
 public Employee(int id, String name, int age) {
  this.age = age;
  this.id = id;
  this.name = name;
 }

 public int getId() {
  return id;
 }
 public void setId(int id) {
  this.id = id;
 }
 public String getName() {
  return name;
 }
 public void setName(String name) {
  this.name = name;
 }
 public int getAge() {
  return age;
 }
 public void setAge(int age) {
  this.age = age;
 } 
}


public final class MyImmutableClass {

 private final int count;
 private final Employee obj;
 
 public MyImmutableClass(int count, Employee obj) {
  this.count = count;
  this.obj = obj;
 }
 public int getCount() {
  return count;
 }
 public Employee getObj() {
  return obj;
 } 
}


public class MyTestClass {

 public static void main(String[] args) {
  
  MyImmutableClass obj1 = new MyImmutableClass(1, new Employee(100, "Steve", 51));
  
  // Here we have created Immutable object for "MyImmutableClass" class
  // Lets see how to change values of mutable object inside Immutable object
  
  obj1.getObj().setName("James");
  
  System.out.println("Count    : "+obj1.getCount());
  System.out.println("Emp ID   : "+obj1.getObj().getId());
  System.out.println("Emp Name : "+obj1.getObj().getName());
  System.out.println("Emp Age  : "+obj1.getObj().getAge());
  
 }
}


OUTPUT:


Count    : 1
Emp ID   : 100
Emp Name : James
Emp Age  : 51


In above example we can see mutable object inside immutable class getting changed. We have created Immutable object with employee name as "Steve" but later same immutable objects value getting changed from "Steve" to "James".
Next we will see how to avoid changing mutable object in Immutable class. For this we need to change 2 things in our above classes 
  • In Employee class implements Cloneable and override clone method.
  • Next in MyImmutableClass class we need to return clone object instead of original Employee Object. 
Below are the class code changed. 


public class Employee implements Cloneable{
 private int id;
 private String name;
 private int age;
 
 public Employee(int id, String name, int age) {
  this.age = age;
  this.id = id;
  this.name = name;
 }

 public int getId() {
  return id;
 }
 public void setId(int id) {
  this.id = id;
 }
 public String getName() {
  return name;
 }
 public void setName(String name) {
  this.name = name;
 }
 public int getAge() {
  return age;
 }
 public void setAge(int age) {
  this.age = age;
 } 
 
 @Override
 protected Object clone() throws CloneNotSupportedException {
  return super.clone();
 }
}


public final class MyImmutableClass {

 private final int count;
 private final Employee obj;
 
 public MyImmutableClass(int count, Employee obj) {
  this.count = count;
  this.obj = obj;
 }
 public int getCount() {
  return count;
 }
 public Employee getObj() {
  try {
   return (Employee)obj.clone();
  } catch (CloneNotSupportedException e) {
   e.printStackTrace();
  }
  return null;
 } 
}


Next run same code MyTestClass class.

OUTPUT:


Count    : 1
Emp ID   : 100
Emp Name : Steve
Emp Age  : 51


Here we can see even we have changed Employee name from "Steve" to "James" actual object not getting disturbed.