Removing null elements from List in Java

In this tutorial lets see how to remove null elements from the given list by using java Collections. Basic we could think iterating through List and to delete all null elements. But by using Collections class it makes easy to remove all null elements. Lets see simple example to delete null elements from list.
Removing null elements from List in Java


public static void main(String[] args) {
 
 final List<Integer> list = new ArrayList<Integer>();
 Collections.addAll(list, 1,2,null,3,4,null,5,6,null,7,8,null,9);
 
 System.out.println("LIST SIZE : "+list.size()+ " - " + list);
 
 list.removeAll(Collections.singleton(null));
 
 System.out.println("LIST SIZE : "+list.size()+ " - " + list);
}


OUTPUT:


LIST SIZE : 13 - [1, 2, null, 3, 4, null, 5, 6, null, 7, 8, null, 9]
LIST SIZE : 9 - [1, 2, 3, 4, 5, 6, 7, 8, 9]


Create user defined substring functions

 
In many interviews we may asked to substring() a string without using substring function from String class. Below are the simple code how we can write our own substring functions similar to String class functions.


public class MyStringOp {

 public static void main(String[] args) {
  
  String str = "Java Discover";
  
  MyStringOp obj = new MyStringOp();
  
  System.out.println(obj.mySubstring(str, 5));
  
  System.out.println(obj.mySubstring(str, 0,4));
 }
 
 public String mySubstring(String str, int start){
  
  if(start > str.length()) 
   throw new StringIndexOutOfBoundsException(); 
  
  String newStr = "";
  char[] ch = str.toCharArray();
  
  for(int i=start;i<str.length();i++){
   newStr = newStr + ch[i];
  }
  return newStr;
 }
 
 public String mySubstring(String str, int start, int end){
  
  if((start > end) || (start > str.length()) || (end > str.length())) 
   throw new StringIndexOutOfBoundsException(); 
  
  String newStr = "";
  char[] ch = str.toCharArray();
  
  for(int i=start;(i<str.length() && i<end);i++){
   newStr = newStr + ch[i];
  }
  return newStr;
 }
}


OUTPUT:


Discover
Java


Simple Factory Design Pattern class

Lets design simple Factory Design Pattern example with code, like how to design a Factory class and how to get objects from factory. 

Consider the scenario that showroom needs application to access their various Car details through online. Like Car1 runs on Petrol and gives mileage upto 28 KM/L and Car2 runs on Diesel and gives mileage upto 24 KM/L. 
Lets create simple Factory Class to create car objects based on parameter information's.

AANND


public interface Car {
 public String getCallDetails();
}


public class Alto implements Car{

 public String getCallDetails() {
  return "Alto runs on Petrol and gives mileage upto 18 KM/L";
 }
}


public class Swift implements Car{

 public String getCallDetails() {
  return "Swift runs on Diesel and gives mileage upto 24 KM/L";
 }
}


public class CarFactory {

 public static Car getCar(String carName){
  
  Car car = null;
  
  if(carName.equalsIgnoreCase("alto")){
   car = new Alto();
  
  }else if(carName.equalsIgnoreCase("swift")){
   car = new Swift();    
  }
  
  return car;
 }
}


public class ShowRoomApplication {

 public static void main(String[] args) {
  
  Car car1 = CarFactory.getCar("alto");
  String details = car1.getCallDetails();
  System.out.println(details);
  
  Car car2 = CarFactory.getCar("swift");
  details = car2.getCallDetails();
  System.out.println(details);
  
  
 }
}


Output:


Alto runs on Petrol and gives mileage upto 28 KM/L
Swift runs on Diesel and gives mileage upto 24 KM/L

Java Thread Local with simple example


Java ThreadLocal is an interesting and important Class in Java where most the developers unaware of it. Lets see what is Java ThreadLocal by its importance and how to use it with simple sample code.
Java Thread Local with simple example


What is Java ThreadLocal?
Java ThreadLocal gives the scope of an Object which stored in the ThreadLocal. We can set any Object in the Thread Local which inturns to be global access for the Thread from anywhere. 
Only thing which we need to keep in mind that to maintain a separate instance copy for each thread, so that Object conflict won't occur between multiple threads.
Values stored in ThreadLocal are local to each threads, i.e., each thread will have it's own ThreadLocal Objects where one thread can not access/modify other thread's Thread Local Objects unless it satisfies preview statement. 

Where to use Java ThreadLocal?
Lets a take situation that we need to use some global value for each thread which can be access across and anywhere the Thread is been called (For example in any methods). In those cases we can value or Object in ThreadLocal and same value or Object can be accessed anywhere in particular Thread call. 

There are 4 methods in ThreadLocal class and they are

  • initialValue() - Returns the current thread's "initial value" for this thread-local variable.
  • get() - Returns the value in the current thread's copy of this thread-local variable.
  • set() - Sets the current thread's copy of this thread-local variable to the specified value.
  • remove() - Removes the current thread's value for this thread-local variable.

Lets see simple example how to use ThreadLocal in Java.


public class MyLocalThreadHolder{
 
 private static final ThreadLocal<String> myThreadLocal = new ThreadLocal<String>();

 public static void set(String val) {
  myThreadLocal.set(val);
 }
 
 public static void delete() {
  myThreadLocal.remove();
 }
 
 public static String get() {
 return myThreadLocal.get();
 }
}


public class TestThreadLocal extends Thread{

 public TestThreadLocal(String tName) {
  this.setName(tName);
 }
 
 public static void main(String[] args) {
 
  TestThreadLocal t1 = new TestThreadLocal("First thread...");
  TestThreadLocal t2 = new TestThreadLocal("Second thread...");
  TestThreadLocal t3 = new TestThreadLocal("Third thread...");
  
  t1.start();
  t2.start();
  t3.start();
 }
 
 @Override
 public void run() {
  //Setting thread name in ThreadLocal
  MyLocalThreadHolder.set(currentThread().getName());
  new PrintLocalThread().printThreadName(); 
 }
}


public class PrintLocalThread {
  
 public void printThreadName(){
  //Getting thread name from ThreadLocal and printing
  String currentThreadName = MyLocalThreadHolder.get();
  System.out.println("Before ----> : "+currentThreadName);
  
  //Removing value set in ThreadLocal
  MyLocalThreadHolder.delete();
  
  currentThreadName = MyLocalThreadHolder.get();
  System.out.println("After ----> : "+currentThreadName);
 }  
}


OUTPUT:


Before ----> : Second thread...
After ----> : null
Before ----> : First thread...
After ----> : null
Before ----> : Third thread...
After ----> : null


Using Mutable Objects inside user defined Immutable Class

We may aware of creating user defined Immutable Class in Java. Basic steps to follow to create immutable class are
Using Mutable Objects inside user defined Immutable Class

  • Maintain all member variables and class has defined with final keyword so that variables value can't be modifies and class can't be overridden. 
  • Variables values must to set through constructor or through factory pattern.
  • Provide only getter methods for member variable. 
In below example lets see simple code which uses mutable object as member variable inside our Immutable class. By returning same original Object in getter which gives loop for user to alter the Objects internal values.


public class Employee {
 private int id;
 private String name;
 private int age;
 
 public Employee(int id, String name, int age) {
  this.age = age;
  this.id = id;
  this.name = name;
 }

 public int getId() {
  return id;
 }
 public void setId(int id) {
  this.id = id;
 }
 public String getName() {
  return name;
 }
 public void setName(String name) {
  this.name = name;
 }
 public int getAge() {
  return age;
 }
 public void setAge(int age) {
  this.age = age;
 } 
}


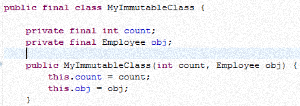
public final class MyImmutableClass {

 private final int count;
 private final Employee obj;
 
 public MyImmutableClass(int count, Employee obj) {
  this.count = count;
  this.obj = obj;
 }
 public int getCount() {
  return count;
 }
 public Employee getObj() {
  return obj;
 } 
}


public class MyTestClass {

 public static void main(String[] args) {
  
  MyImmutableClass obj1 = new MyImmutableClass(1, new Employee(100, "Steve", 51));
  
  // Here we have created Immutable object for "MyImmutableClass" class
  // Lets see how to change values of mutable object inside Immutable object
  
  obj1.getObj().setName("James");
  
  System.out.println("Count    : "+obj1.getCount());
  System.out.println("Emp ID   : "+obj1.getObj().getId());
  System.out.println("Emp Name : "+obj1.getObj().getName());
  System.out.println("Emp Age  : "+obj1.getObj().getAge());
  
 }
}


OUTPUT:


Count    : 1
Emp ID   : 100
Emp Name : James
Emp Age  : 51


In above example we can see mutable object inside immutable class getting changed. We have created Immutable object with employee name as "Steve" but later same immutable objects value getting changed from "Steve" to "James".
Next we will see how to avoid changing mutable object in Immutable class. For this we need to change 2 things in our above classes 
  • In Employee class implements Cloneable and override clone method.
  • Next in MyImmutableClass class we need to return clone object instead of original Employee Object. 
Below are the class code changed. 


public class Employee implements Cloneable{
 private int id;
 private String name;
 private int age;
 
 public Employee(int id, String name, int age) {
  this.age = age;
  this.id = id;
  this.name = name;
 }

 public int getId() {
  return id;
 }
 public void setId(int id) {
  this.id = id;
 }
 public String getName() {
  return name;
 }
 public void setName(String name) {
  this.name = name;
 }
 public int getAge() {
  return age;
 }
 public void setAge(int age) {
  this.age = age;
 } 
 
 @Override
 protected Object clone() throws CloneNotSupportedException {
  return super.clone();
 }
}


public final class MyImmutableClass {

 private final int count;
 private final Employee obj;
 
 public MyImmutableClass(int count, Employee obj) {
  this.count = count;
  this.obj = obj;
 }
 public int getCount() {
  return count;
 }
 public Employee getObj() {
  try {
   return (Employee)obj.clone();
  } catch (CloneNotSupportedException e) {
   e.printStackTrace();
  }
  return null;
 } 
}


Next run same code MyTestClass class.

OUTPUT:


Count    : 1
Emp ID   : 100
Emp Name : Steve
Emp Age  : 51


Here we can see even we have changed Employee name from "Steve" to "James" actual object not getting disturbed. 


Clustering and scale-able data distribution platform for java using Hazelcast

In recent days we may seen application which get millions of hits per day like online flight/ train booking or hotel searching etc., Basically most of the search operations are mean to static and fixed data for some like list of flights available per day, list of hotels in Bangalore etc., When we see these kind of request to our application each request may need to hit database to get the appropriate results which makes multiple request to database for same type of request and makes application slow. By one way we can over come this problem by using load balancer or distributed network etc., But even then hitting to database for these requests are common and in some ways application can be faster but not scale-able to most extend.
Clustering and scale-able data distribution platform for java using Hazelcast
To scale the application more we can use Distributed Caching under clustered network. In that case we can use one of the most scale-able and high performance 3rd party open source called Hazelcast. Hazelcast is a clustering and highly scale-able data distribution platform for Java. Hazelcast helps architects and developers to easily design and develop faster, highly scale-able and reliable applications for the business. Also Facilitates fail-over and scalability and well fitted for applications that query using simple SQL-predicates. Most important its open source under Apache license.     
  •     Distributed implementations of java.util.{Queue, Set, List, Map}
  •     Distributed implementation of java.util.concurrent.ExecutorService
  •     Distributed implementation of java.util.concurrency.locks.Lock
  •     Distributed Topic for publish/subscribe messaging
  •     Transaction support and J2EE container integration via JCA
  •     Distributed listeners and events
  •     Support for cluster info and membership events
  •     Dynamic HTTP session clustering
  •     Dynamic clustering
  •     Dynamic scaling to hundreds of servers
  •     Dynamic partitioning with backups
  •     Dynamic fail-over 
  •     Super simple to use; include a single jar
  •     Super fast; thousands of operations per sec.
  •     Super small; less than a MB
  •     Super efficient; very nice to CPU and RAM 
By using Hazelcast we can achieve
  • To reduce the load on database, deploy a distributed cache with several nodes running in the cluster
  • Cache data from database
  • Cached data is distributed equally between all the nodes
  • To avoid cache from ballooning, keep expiry on items.
  • Old untouched data from cache will expire from cache base on configuration. 
  • We can restrict using caching to limited nodes from the entier network. For example from total 10 cluster nodes if we need to use Hazelcast caching only in 5 nodes then we can done through Hazelcast configuration file. Or by default Hazelcast will deduct all nodes and makes first node as master. 
Lets see simple example for using Hazelcast caching in java application and first lets see how to configure Hazelcast. 


Unzip it and add the lib/hazelcast.jar to your class path.

Next we will create Java class and import Hazelcast libraries using any Java IDE. Below are the simple code sample to use Hazelcast.


import java.util.Map;
import java.util.Queue;

import com.hazelcast.config.Config;
import com.hazelcast.core.*;

public class HazelcastTesting {

 public static void main(String[] args) {
  Config cfg = new Config();
  HazelcastInstance ins = Hazelcast.newHazelcastInstance(cfg);
  
  Map<Integer, String> myMap = ins.getMap("names");
  myMap.put(1, "IOS");
  myMap.put(2, "Android");
  myMap.put(3, "Java");
  myMap.put(3, "Microsoft");
        
  System.out.println("Second Name : "+myMap.get(2));
  System.out.println("Map Size    : "+myMap.size());
        
        Queue<String> myQueue = ins.getQueue("brand");
        myQueue.offer("Apple");
        myQueue.offer("Samsung");
        myQueue.offer("Nokia");
        myQueue.offer("HTC");
        myQueue.offer("Google");
        
        System.out.println("First Brand Name : "+myQueue.poll());
  
 }
}

OUTPUT:


May 06, 2014 3:47:56 PM com.hazelcast.instance.DefaultAddressPicker
INFO: Prefer IPv4 stack is true.
May 06, 2014 3:47:56 PM com.hazelcast.instance.DefaultAddressPicker
INFO: Picked Address[10.70.54.75]:5701, using socket ServerSocket[addr=/0:0:0:0:0:0:0:0,localport=5701], bind any local is true
May 06, 2014 3:47:56 PM com.hazelcast.system
INFO: [10.70.54.75]:5701 [dev] Hazelcast Community Edition 3.1.7 (20140321) starting at Address[10.70.54.75]:5701
May 06, 2014 3:47:56 PM com.hazelcast.system
INFO: [10.70.54.75]:5701 [dev] Copyright (C) 2008-2014 Hazelcast.com
May 06, 2014 3:47:57 PM com.hazelcast.instance.Node
INFO: [10.70.54.75]:5701 [dev] Creating MulticastJoiner
May 06, 2014 3:47:57 PM com.hazelcast.core.LifecycleService
INFO: [10.70.54.75]:5701 [dev] Address[10.70.54.75]:5701 is STARTING
May 06, 2014 3:48:06 PM com.hazelcast.cluster.MulticastJoiner
INFO: [10.70.54.75]:5701 [dev] 


Members [1] {
 Member [10.70.54.75]:5701 this
}

May 06, 2014 3:48:06 PM com.hazelcast.core.LifecycleService
INFO: [10.70.54.75]:5701 [dev] Address[10.70.54.75]:5701 is STARTED
May 06, 2014 3:48:06 PM com.hazelcast.partition.PartitionService
INFO: [10.70.54.75]:5701 [dev] Initializing cluster partition table first arrangement...
Second Name : Android
Map Size    : 3
First Brand Name : Apple


In above code we have created Map and Queue instance under Hazelcast instance. From output we can see using server socket localport and address are binding and allowing other nodes to listen. Also we can see new Hazelcast member created and allowed to listen through new port 5701 like

Members [1] {
Member [10.70.54.75]:5701 this
}